Motor Car History
Technical History of the Motor Car


1890s  1900s  1910s  1920s  1930s  1940s  1950s  1960s   1970s  1980s  1990s  2000s  2010s

Toggle Navigation
  • Home
  • Makes and models
  • Motor car History
  • Maintenance Guide
    • Engines By Make
    • Engine Components
    • Electrical & electronic
    • Gearbox & Drivetrain
    • Induction & Exhaust
    • Suspension Types
    • Tyres wheels Brakes
    • Vehicle Body types
  • Trivia
  • Register
  • *Top rated*
  • You are here:  
  • Motor Car
  • Maintenance Guide
  • Vehicle Body
  • Paint Flatting scratches problems
Technical Guides

Paint Flatting scratches problems

Paint Flatting scratches problems


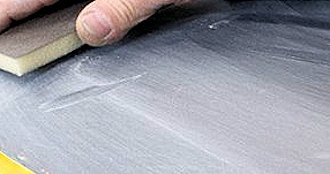
This section includes Paint Flatting scratches problems, lifting, raising or swelling of flatting scratches. This is often a mild form of lifting. To repair allow film to harden thoroughly, then rub out and polish. If scratches are still too noticeable, wet flat with P600 grit paper and respray.


Cause
1. Light scruffing or scratching of old surface, usually with too coarse grit wet and dry.
2. Insufficient flatting of old finish or under-coat.
3. Use of coarse grit wet and dry.
4. Improper cleaning of surface.
5. Flatting across area being repaired and old surface which contains silicone.This really brings the scratches up.
6. lure to allow undercoat to dry thoroughly before flatting.
7. Flatting with petrol.
8. Spraying filler coats too heavily, especially the first coat over old finishes.
9. Use of poor-quality or wrong thinner.

Prevention
1. Use wax and grease remover and plenty of new clean rags to clean an area several times larger than repair area.
2. Use fine grit wet and dry, flatting well back into old finish.
3. Use recommended type and amount of thinner in primer—filler.
4. First coat of primer should be applied wet but thin.
5. Allow enough time between coats of filler for each one to dry.
6. Do not blow air on primer-filler to make it dry faster.
7. Allow surfaces to harden thoroughly before flatting.
8. Never use petrol for flatting old finish or fillers.
9. Flat with P600 grit wet and dry.
10. Allow to dry out thoroughly before applying colour.
11. Thin colour with amount and type of thinner recommended by paint manufacturer.
12. Avoid cheap thinner.
13. Apply as recommended by the manufacturer.

Related items
vehicle body repair | Vehicle Paint
  • Vehicle Body Previous 56 / 111 Next

Body Types

  • Vehicle Body TypesVehicle Body Types
    • Berlinetta
    • Bullnose
    • Dicky seat
    • Gull wing
    • high wheelers
    • Landaulet
    • Shooting Brake
    • Spider
    • superleggera
    • Targa
    • Torpedo
    • Tricar
    • Vignale

On Motor Car

  • Maintenance Guide
  • Makes and Models
  • Motor car History
  • Film & TV
  • Your Top Rated *****
  • Join here

log on

Log in to Motor car

  • Forgot your username?
  • Forgot your password?

Welcome To Motor Car

  • cyclecar
  • Newcastle-on-Tyne UK
  • Convertible
  • campervan
  • limousines
  • Micro car
  • Roadster
  • British Concept Cars
  • Coach-Bus
  • British Sports cars
  • Steam Cars
  • Electric cars 1890s
  • Driving techniques
  • Britain 1970s
  • vehicle body parts
  • Service related
  • Vehicle Paint
  • vehicle body repair
  • Technical terms
  • welding

Help Guide

  • Engine
    • Manufacturers
    • Components
    • Cooling System
    • Cylinder
    • Fuel system
    • Ignition System
    • Starter motor
    • Turbo
    • Crankshaft
    • Piston
    • ECU related
    • Injection
  • Carburettor
    • Holley
    • Solex
    • SU
    • Weber
    • Zenith
    • Stromberg
  • Drivetrain
    • Clutch
    • Gearbox
    • Tyres
    • Wheels
    • Driving techniques
  • Suspension
  • Electrical
  • Vehicle Body
  • Brakes
  • Service Guides
  • Tools

Please help to keep this site active.

Enjoy all of Motor Car Here


Back to Top

© 2025 Motor Car History